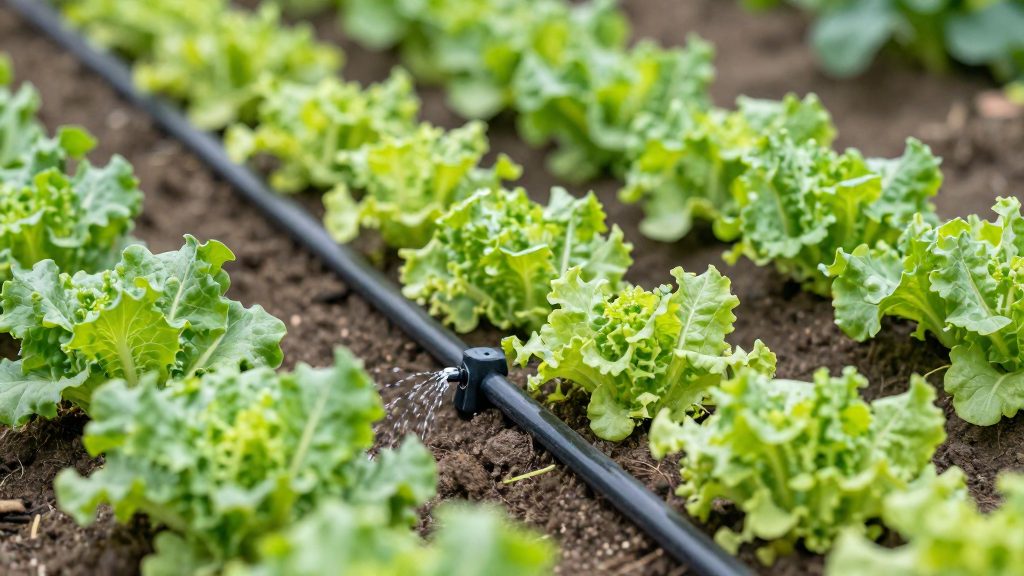
Drip irrigation uses about 75% less water than overhead sprinklers, according to University of Georgia Extension (2022). It also keeps foliage dry and delivers water to the root zone, which together lower the risk of foliar disease. For an organic vegetable garden, these are the main reasons to choose drip over overhead watering.
Why drip irrigation suits an organic vegetable garden
Drip irrigation solves two problems that overhead watering creates in a vegetable bed: wasted water and wet leaves. The comparison below summarizes the differences.
| Criterion | Drip irrigation | Overhead sprinklers |
|---|---|---|
| Water use | About 75% less (University of Georgia Extension, 2022) | Reference level for the comparison |
| Foliage | Stays dry | Wetted by the spray |
| Water placement | Delivered to the root zone | Sprayed over the plant canopy |
Water savings compared with overhead sprinklers
Sprinklers cover the whole surface of a bed, so a large share of the water falls between plants and on bare soil rather than where roots absorb it. Drip irrigation sends water at low flow to the soil around each plant. According to University of Georgia Extension (2022), this approach uses about 75% less water than overhead sprinklers. For a grower managing a small plot, that reduction lowers both the volume of water drawn from a tank or a well and the time spent watering.
Dry foliage and lower disease risk
Overhead watering wets leaves, stems, and fruit. Damp leaf surfaces give fungal and bacterial spores the moisture they need to establish, which is why foliar disease is more frequent in beds watered from above. University of Georgia Extension (2022) notes that drip irrigation keeps foliage dry and reduces foliar disease. For an organic grower who avoids synthetic fungicides, this effect is one of the most practical benefits. Dry leaves do not remove the need for good spacing, crop rotation, and healthy soil, but they reduce one of the main conditions that favor disease.
Water delivered to the root zone
The root zone is the soil volume where most absorbing roots of a vegetable plant are concentrated. Drip emitters or tubing placed at the base of each plant release water slowly into that soil, so it soaks downward and stays available to roots. Because the water does not run off the surface or evaporate from a wide spray pattern, more of it reaches the plant.
How much water do vegetables need?
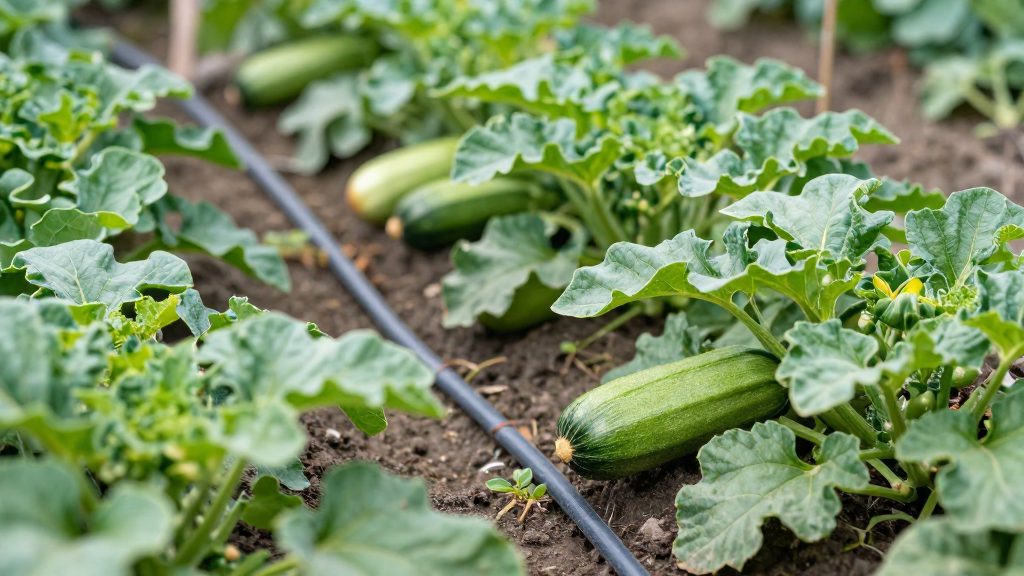
According to University of Georgia Extension (2022), most vegetables need about 1 inch of water per week. This figure is a general weekly target, not a fixed schedule, and it can be adjusted for weather and soil. Rain counts toward it, so the drip system only needs to supply the difference.
Converting 1 inch into gallons per square foot
One inch of water spread over 1 square foot is about 0.62 gallons. The conversion is therefore straightforward:
| Weekly target | Depth | Volume per square foot |
|---|---|---|
| About 1 inch | 1 inch | About 0.62 gallons |
| Half of 1 inch | 0.5 inch | About 0.31 gallons |
To calculate the volume for a whole bed, use this formula:
gallons ≈ area (sq ft) × water depth (inches) × 0.623
For example, a 100 sq ft bed needs about 62 gallons per week to reach the 1-inch target, minus any rainfall recorded that week.
Measuring what the bed actually receives
- Place several straight-sided containers, such as empty tins, across the bed at the emitter line.
- Run the system for a set time and measure the depth collected in each container.
- Calculate the average and adjust the run time until the depth matches your weekly target.
Repeat this check whenever you change the layout, line length or pressure, because these can change how evenly water is delivered.
Adjusting the weekly volume
The official sources consulted do not specify percentage adjustments for season or soil texture, so the principles below are general guidance:
- Hot, dry periods increase plant water use. Check the soil more often during these spells, using a finger test a few inches down.
- Sandy soils drain quickly and hold less water. Shorter applications repeated more often usually suit them better.
- Clay soils hold water longer. Fewer, slower applications help prevent waterlogging.
What components does a drip system need?
A drip system is assembled in sequence, from the water source to the point where water reaches the soil. According to the University of Georgia Extension (2022), a drip system needs a pressure reducer and a pressure gauge, and the filter goes at the front of the system. The table below lists each part and its function. The order of the pressure reducer and gauge is not specified by the sources.
| Component | Function | Notes |
|---|---|---|
| Header pipe | Connects the water source to the rest of the system | Ranges from 0.5 inch to 1 inch or more; a larger pipe delivers more volume |
| Filter | Removes sediment before water enters the lines | Placed at the front of the system |
| Pressure reducer | Adjusts water pressure before it enters the lines | Lasts many years with proper care |
| Pressure gauge | Shows the pressure in the system | Lets you check that pressure is within the expected range |
| Mainline | Carries water from the header to the drip lines | Connects the header to each bed |
| Drip lines | Carry water along the rows of a bed | Lay them along the planting rows |
| Emitters | Release water slowly at the base of each plant | — |
| End caps | Close the open ends of the lines | Keep water inside the system |
The official sources consulted do not specify the exact position of the pressure reducer or the pressure gauge along the line, so check the manufacturer’s layout for your kit.
The header pipe, filter, and pressure reducer last many years when they are cared for properly, according to the University of Georgia Extension (2022). Because the filter is the first barrier against debris, its placement at the front of the system is what protects every downstream component, including the emitters.
Drip tape or rigid line: which should you choose?
Both options deliver water at the root zone. The choice between them comes down to upfront cost and expected lifespan.
| Feature | Flexible T-tape | Rigid drip line |
|---|---|---|
| Purchase cost | Most economical option | Costs more |
| Typical lifespan | Usually one or two seasons | Lasts many seasons |
| Best suited to | Budget setups, short-term or changing layouts | Fixed beds with a long-term plan |
Flexible T-tape
Flexible T-tape is the cheapest way to start, which makes it attractive for a first installation or a small garden. It is usually replaced after one or two seasons, so its cost should be compared over that period rather than as a single purchase.
Rigid drip line
Rigid lines cost more at the start but last many seasons. For a permanent layout that stays in place year after year, the higher price is spread across a longer service life.
How to choose
- Measure first. Add up the total length of your beds and paths where lines will run. The total run determines how much material you need, and it makes cost comparisons accurate.
- Set your budget. If money is tight, start with flexible tape. If you can afford the upfront cost, rigid line usually makes more sense for long-term beds.
- Consider how often you rearrange. If you rotate crops or reshape beds frequently, flexible tape is easier to reposition and replace. If your layout is fixed, a rigid system suits it better.
Is drip irrigation allowed in certified organic production?
The official sources consulted do not cover organic certification rules, so whether a drip system is acceptable depends on your certifying body. Verify compliance before buying tubing or installing anything. The steps below cover what to clarify, which materials to document, and which records to keep.
Check with your certifying body before installation
- Contact your certifying body in writing and describe the planned system: drip lines, filter, pressure reducer, pressure gauge, and water source.
- Ask for a written confirmation. A verbal answer is difficult to prove if an inspector questions the system later.
- Ask whether a change in irrigation method must be declared before you make it, and whether it affects your certification file.
Confirm material approvals for tubing and fittings
- Request the manufacturer’s documentation for every plastic component, including flexible tape, rigid tubing, and fittings.
- Check with your certifier whether those materials are accepted, since the official sources consulted do not list approved plastics.
- Store product references and documents with your certification file so they can be shown on request.
| Component | What to record |
|---|---|
| Flexible T-tape | Install date and replacement date. |
| Rigid drip tubing | Install date. |
| Filter | Cleaning and inspection dates. |
| Pressure reducer and gauge | Installation date and any readings taken. |
Document the water source and irrigation records
- Record the water source (well, rain tank, or municipal supply) and keep any related documents with your file.
- Log each irrigation event with the date and duration, and the volume if you measure it.
- Compare your totals against the reference that most vegetables need about 1 inch of water per week.
Keeping these records together lets you show an inspector each stage of the system, from the water source to the materials and the watering schedule.
How do you keep emitters from clogging?
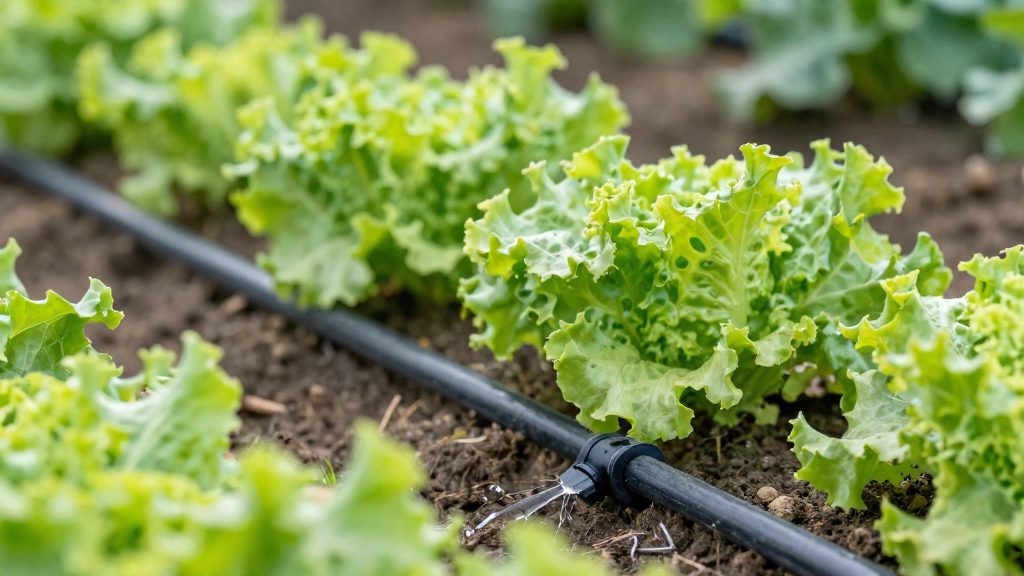
Sediment carried in the water source is a main cause of emitter clogging. The University of Georgia Extension (2022) advises checking and cleaning the filter often for this reason. Emitters have very small openings, so grit or fine debris can block them and leave plants with uneven moisture. Prevention relies on two routines: cleaning the filter and flushing the lines. Both are mechanical routines. The sources consulted do not cover other cleaning methods, so check the manufacturer’s guidance and your certifier’s rules before using any product.
Why sediment blocks emitters
Water from a rain barrel, pond, well or municipal connection can carry particles. Once particles reach the tubing, they settle at bends, dead ends and emitter inlets. Over a season, this buildup narrows the openings until water flow drops.
Checking and cleaning the filter
Inspect the filter regularly during the growing season, not only at installation. The filter is the main barrier against sediment, so a dirty screen passes less water and lets debris through to the emitters.
- Shut off the water and relieve line pressure before opening the housing.
- Remove the screen and rinse it under clean water.
- Scrub stubborn deposits with a soft brush. Avoid tools that could tear the mesh.
- Inspect the screen for tears or holes. A damaged screen no longer filters properly and should be replaced.
- Reassemble the housing, check the seals and restart the system.
Flushing the lines
Flushing pushes loose debris out of the tubing before it reaches the emitters.
| Routine | When to do it | What to do |
|---|---|---|
| Filter inspection | Regularly through the season | Look for visible debris on the screen |
| Filter cleaning | Whenever debris builds up | Remove the screen, rinse and brush it |
| Line flushing | After cleaning the filter and at the start of the season | Open each end cap or flush valve and run water until it runs clear |
After flushing, close the end caps and check that emitters are still delivering water evenly along each row.
Drip irrigation in raised beds
Raised beds drain quickly, and the University of Georgia Extension (2022) notes that they need more frequent watering. Drip irrigation suits this setup because it delivers water slowly at the root zone instead of as a heavy surface soak.
How drainage changes watering frequency
- Raised beds drain quickly, so water moves past the root zone sooner than expected.
- Before each run, push a trowel or finger into the bed to check moisture at root depth. Water only when the soil is dry at that depth.
- Plan several shorter runs across the week instead of one long run. A single long run on a fast-draining bed can carry water below the roots.
Layout of drip lines across bed rows
- Lay one drip line along each row of plants, running the length of the bed.
- Connect the lines to the header pipe described in the components section.
Watering frequency in raised beds
Because raised beds lose water quickly, spread shorter runs across the week and check the soil before each one. The official sources consulted do not specify run lengths or soil mixes for raised beds, so adjust the timing to what you observe at root depth.
Winterizing and extending system life
Draining, storing and inspecting the system at the end of each season protects its components for later years.
Draining the lines before freezing
- Shut off the water supply at the source first.
- Open the end caps or flush plugs at the low points of the lines and let all remaining water run out.
- Drain the filter bowl and the pressure gauge line so no water stays trapped in the front of the system.
- Raise the header pipe end slightly so gravity moves water toward the drain points.
The official sources consulted do not specify a temperature threshold for this step, so base the timing on the frost dates in your region and drain before the first hard frost.
Storing tape and fittings
Keep the storage out of direct sunlight. The official sources consulted do not specify how much sun exposure shortens tape life, so shade is a precautionary measure.
- Coil flexible tape loosely, with loops wide enough to avoid kinks.
- Store it in a shed, garage or covered container.
- Keep connectors, end caps and spare fittings in a dry, labeled box so they are easy to find in spring.
- Store the pressure reducer and gauge in a dry place, separate from the tape.
Inspecting before the next season
Carry out an inspection before reconnecting the system, ideally in early spring:
- Check the filter for sediment buildup, cracks and damaged seals.
- Check the pressure gauge and reducer for leaks or visible damage.
- Look over the tape for splits, kinks or sections that have become stiff.
- Check the header pipe and fittings for cracks or loose connections.
- Run a short test with water and watch for leaks at the fittings.
Replace any tape that has split or lost its flexibility. Filter cleaning during the season is covered in the clogging section.
Frequently asked questions
How much water does a drip-irrigated vegetable bed need each week?
Typical vegetable plots call for roughly 1 inch of water weekly, according to University of Georgia Extension (2022). Raised beds drain quickly and need watering more often than in-ground rows; as a conversion, 100 square feet at 1 inch of water requires about 62 gallons.
Which type of drip tubing should a beginner choose?
According to University of Georgia Extension (2022), flexible T-tape is the least expensive option but usually lasts only one or two seasons. Rigid drip systems cost more upfront but last many seasons, so the right choice depends on budget and how long the installation should remain in place.
Where should the filter go, and what do the sources not cover?
The filter belongs at the front of the system, and University of Georgia Extension (2022) advises checking and cleaning it often because sediment clogs emitters. The official sources consulted do not specify where the pressure reducer or pressure gauge should be placed, and they do not cover chemical cleaning or organic certification rules.